
I noticed that my 'About Me' page didn't even have a picture yet. Now I finally understand that awkward feeling all of those conceptual photographers on flickr feel- looking at yourself on your computer for hours on end is just weird to say the least. I can't imagine being able to do this for 365 days.
I'm a straight up noobie when it comes to conceptual photography (if you want to see some amazing examples check out the flickr links on the right). By no means whatsoever do I consider myself a capable photoshop instructor, but at the same time I think it would be nice to give a tutorial so all of you who are as inexperienced as I am can follow along with the learning progress.
Okay first we need to take a self portrait... I decided to take mine in front of my piano room next to the front door- the light shining through the glass from the door added what I thought a nice dramatic tone.

Now if you have a remote or a pocket wizard then that's great. I don't. So I had to find a way to get my portrait in focus, so I looked around the house to find something that was roughly the same height as I am (not too terrible of a task since I am a rather short) until I found an easel.


However, it was rather difficult to get it in focus because the poles that make up the easel are rather skinny, and the camera kept focusing on the background instead. To solve this problem I just threw a sweater on top of it to make the job easier.


After getting it into focus, switch your camera into manual focus and turn on the self timer. Now it's just a matter of moving the easel out of the way and standing in its place.
For the frame I just followed the same steps. I didn't care at the time whether how big or small it was because later in photoshop you can shrink or enlarge the frame to make it seem in perspective.

Okay now for the photoshop part: I'm still not very experienced with using it all and I'm pretty sure there are better methods than what I used so if anyone wants to chime in than please do. First out of all the self portraits I chose the one that I was the least self-conscious about liked the most.
However, I found the colors of the background to be a bit distracting, especially when I edited in the frame, so I used the Desaturate tool (image >Adjustments>Desaturate) to convert it into black and white. Also, the door frame of the piano room was annoying so I cropped that out, and the wrinkles from where my elbow touches my other hand were just plain ugly so I got rid of those via the clone stamp.
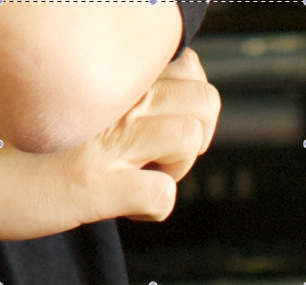
However, I found the colors of the background to be a bit distracting, especially when I edited in the frame, so I used the Desaturate tool (image >Adjustments>Desaturate) to convert it into black and white. Also, the door frame of the piano room was annoying so I cropped that out, and the wrinkles from where my elbow touches my other hand were just plain ugly so I got rid of those via the clone stamp.

Before

After


Before After
Okay now here's what I did to add the frame: in Photoshop use the polygonal lasso tool to select the frame. Right click > Layer via copy. On the right toolbar drag that layer onto our black and white edit.


Now in order to adjust the frame, click on it's layer and click Edit> Free Transform. You are now free to move around, size, and adjust it to your liking. One of the problems I ran into was that the I couldn't fit what I wanted into the frame without making it ginormous, so I chopped away the inner matting.


And a helpful hint I wish someone would've told me when I first started out using photoshop: make duplicate layers. For instance, I could've spent twenty minutes editing the picture frame layer only to be dissatisfied with the result. Instead of having to a) start over from the drag and drop step or b) rape the undo button, I simply have to just delete the mistake layer.


Now I had something that looked like this-

After I got it to the size I wanted, I experimented with various blurs (gaussian/lens blurs) to make the frame seem slightly out of focus and make it blend in. I also used some curves on that specific layer to try to match the background until I was satisfied with the result.

And a helpful hint I wish someone would've told me when I first started out using photoshop: make duplicate layers. For instance, I could've spent twenty minutes editing the picture frame layer only to be dissatisfied with the result. Instead of having to a) start over from the drag and drop step or b) rape the undo button, I simply have to just delete the mistake layer.
No comments:
Post a Comment